I never understood the allure of red velvet cake. It's just a red cake. Right? Then I started making them and I figured it out. It's a perfect combination of chocolate cake and vanilla cake. Then why the red? My personal theory is its sole purpose is to mask the ugly color you get before adding the coloring.
The Cake Batter
Most vanilla cakes, or variations of vanilla, are made with a butter and sugar base. Cream together before adding eggs, flour, and whatnot. Chocolate cakes tend to be vegetable oil-based. No creaming is generally needed.
Why is this important? This red velvet recipe creams together the butter and the sugar, plus it has cocoa powder. Making it a weird chocolate-vanilla hybrid.
I am not a huge chocolate person, and that's what makes this recipe so perfect for me. It's light chocolate, but also super buttery. It's my nearly perfect cupcake. My pumpkin cupcake will always win out. Don't judge. I'm allowed to pick favorites.
The Red Color
After doing some research I realized the reason that red velvet cake is "red is due to a chemical reaction between the cocoa, buttermilk, and baking soda. However, it's more of a dark ugly red, so people started adding red food coloring to it to enhance the look.
Prior to adding the red color to this recipe, the batter is a really ugly grey color. It doesn't have enough Cocoa to turn it dark, and the butter and sugar also help keep it light in color.
In other words, it wouldn't be as pretty if you didn't add the color. So technically, I guess you could make a blue, purple, or black velvet cake if you wanted and it would still be delicious.
Dye Free Red Velvet
My son has ADHD, and I refused to believe for the longest time that red food dye had a negative effect on kids (especially those with ADHD). I learned the very very very hard way that it 1,000% has an effect on my son. I am not saying this to start a debate, I'm really noting it to say dye-free colors exist.
That being said, I used Natural Food Dye in this recipe and it did NOT turn out. It was the dark, slightly tinted red color that give red velvets their name. I believe that happened because of them being vegetable-based dyes. So when baked, they changed colors.

Natural Dye Free Coloring
If you are trying to stay away from Red40 this is for you. We recently made the switch to natural color as much as possible and this is what I would recommend.

Red Food Gel
This red food gel is what I would recommend for anyone not concerned about Red40 or petroleum-based dyes. You can get smaller containers, but the cost savings here is high.
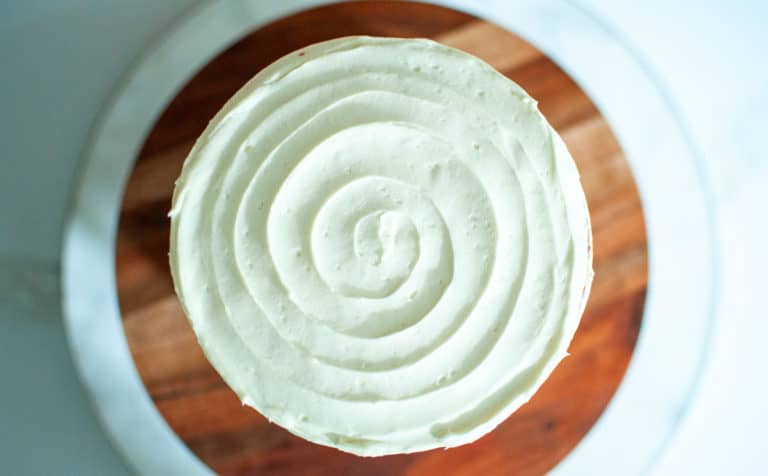
The Perfect Frosting
Cream cheese frosting is my official recommendation for red velvet cake. I don't know why every time I make this frosting and go in for my little taste test bite I keep being surprised by how good it is. The last time I made this was for a friend and it had been way longer than I would like to admit since I'd made it. Goodness, it's just so delicious.
Unlike so many grocery store cream cheese frostings, the ability to use real cream cheese and butter just takes it to another level. If you were on the fence about which frosting to use, hopefully, this just pushed you off of it 😉
Cake vs. Cupcake
The batter is exactly the same, it's simply the cooking time that changes. Cakes are bigger, so it makes sense they take a little longer to cook. The cupcakes will take around 20 minutes to bake, and a 9" round cake will take somewhere around 25-30 minutes.
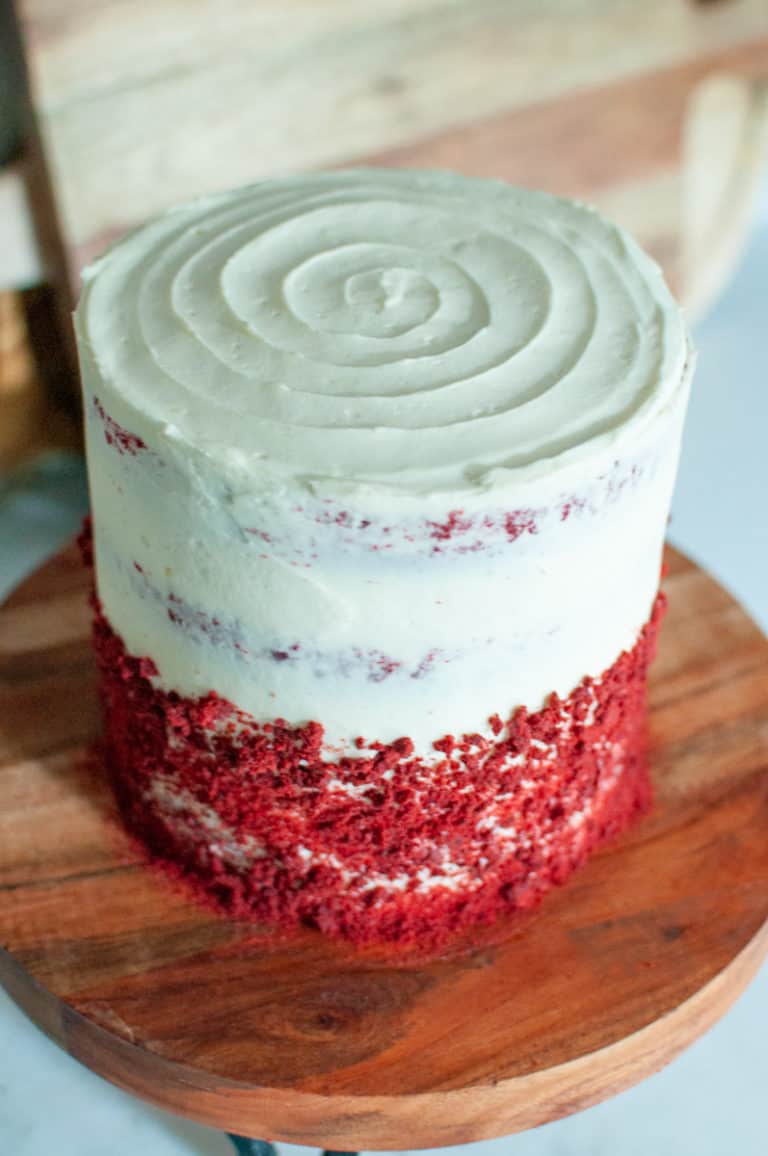
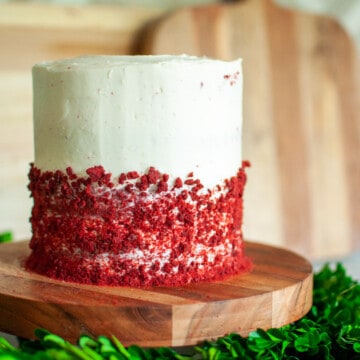
Something to note, is this recipe as it stands will make one dozen cupcakes OR fill one - 9" cake pan. The cake you see displayed below is a 5" round cake, so it fills 2 of them perfectly. However, the cake pictured is 4 layers. I doubled the recipe! You can do this easily by just selecting the X2 button on the recipe card below!
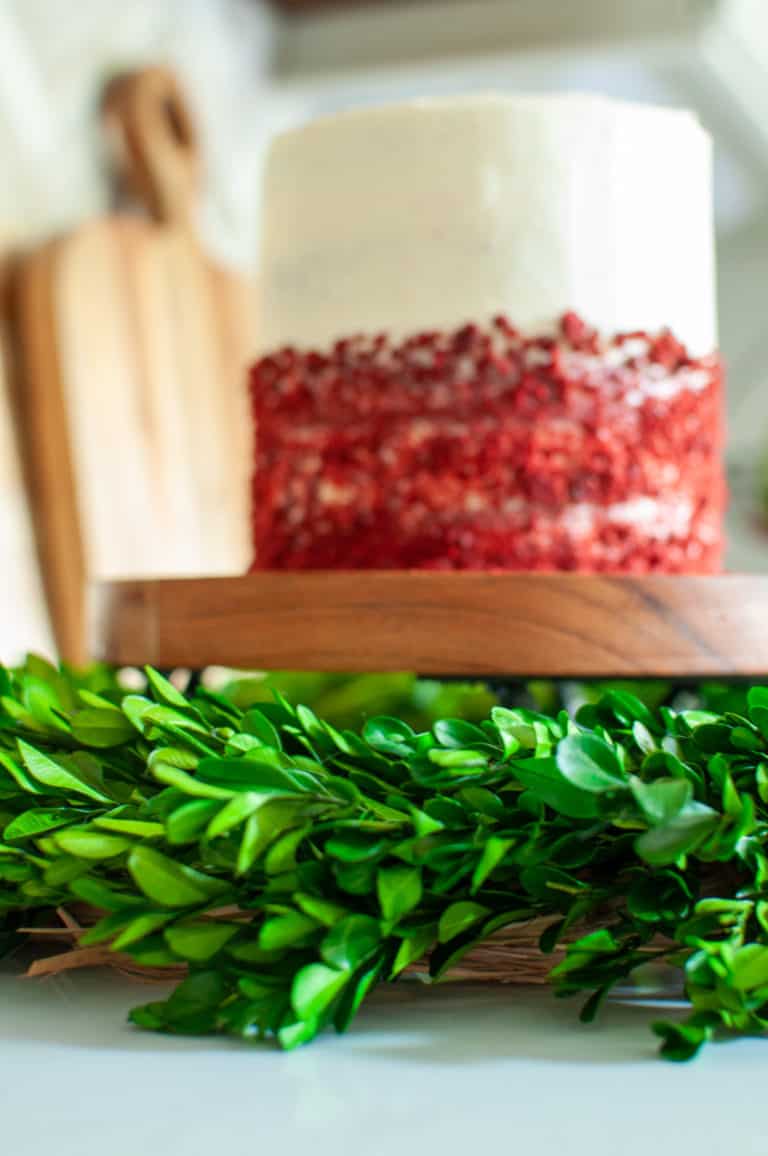
Cake Crumb Decoration
When stacking a layered cake it's important to cut off the crowns or tops of each one so they sit level as you stack. I recently took those leftover cake tops and crumbled them up, tossed them on a sheet tray, and threw them back in the oven at 225 for about 20 minutes. They were perfect cake crumbles when they were done.
I simply took a rolling pin to get everything crushed up a little more evenly and with my hand smushed them onto the side of the cake. It was easy, free, and delicious!
You can also just shove any leftover cake tops straight into your mouth... That is also a fully acceptable choice.
Enjoy!!
📖 Recipe
Red Velvet Cake & Cupcakes
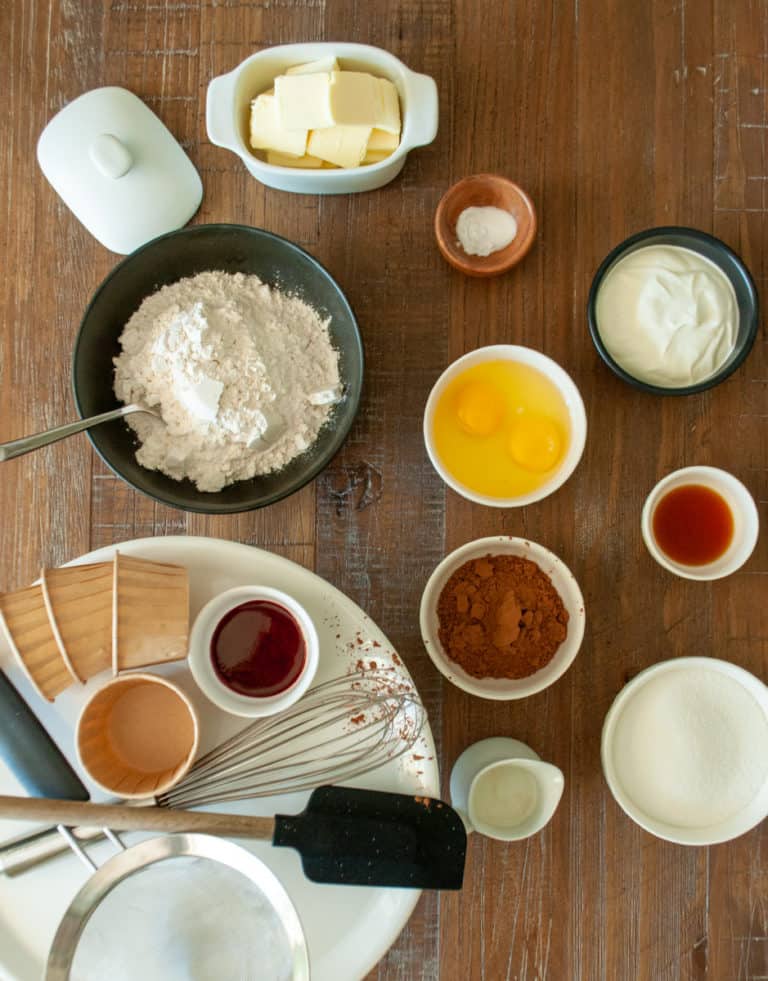
Ingredients
Dry Ingredients
- 1 ¼ cup All-Purpose Flour
- ¼ cup Cocoa Powder
- ½ teaspoon Baking Soda
- ¼ teaspoon Salt
Creamed Butter & Sugar
- 1 cup Granulated Sugar
- 2 Eggs
- 8 tablespoon Unsalted Butter - Room Temperature - 1 stick or ½ cup
Wet Ingredients
- ½ cup Sour Cream
- ¼ cup Milk
- 1 teaspoon Vanilla Extract
- Red Food Coloring - as needed
Instructions
Making the Batter
- We need to set aside the dry ingredients - Flour, cocoa, baking powder, baking soda & salt. NOT SUGAR.
- In a small bowl or measuring cup mix together the milk, sour cream, and vanilla. It should be thick but pourable. (I do this in a 2 cup measuring cup and it worked perfectly).
- In our main mixing bowl, cream together the butter and the sugar until light yellow and slightly fluffy.
- Add the eggs next, one at a time until the first completely dissapears.
- Next, we will alternate adding the dry & wet ingredients. Adding Dry - Wet - Dry- Wet - Dry. This helps keep our batter nice a silky.
- Scrape the bowl down as much as possible to make sure there aren't any hiding chunks of butter/sugar at the bottom or sides of your bowl.
Cupcakes
- Using cupcake papers, pre-line for a dozen.
- Using a portion scoop, put 1 scoop in each cup. If you don't have a portion scoop, use a ¼ cup measuring cup and fill about ¾ of the way up.
- Bake at 350 degrees for about 22-25 minutes or until a toothpick pulls clean.
Cake
- Make sure to butter & flour your pans so they release nicely. I use about 1 tablespoon of butter on a paper towel and rub the bottom and sides. Then add about ¼ cup of flour and shake it all around. When done, I turn them upside down and tap the bottom.
- Next, evenly divide the batter between your pans. I've personally tested this recipe works for anything from 5"- 9" pans and it's worked out beautifuly.
- Bake at 350-degrees oven for about 30-35 minutes or until a toothpick pulls clean.

Comments
No Comments