
Our Kitchen Remodel Process... Step by Step
This step-by-step guide is meant to help anyone in the planning phases of a kitchen remodel understand the process of what they are about to get into. Including cost! We finalized our design months ago (see the Phase -1 post) and signed our contract with our contractor Complete Renovation Solutions. That kicked off the order for the cabinets, which as you can guess took a hot minute to come in.
If you want to watch the whole process through video vs reading everything, check out the video playlist at the bottom of the page!
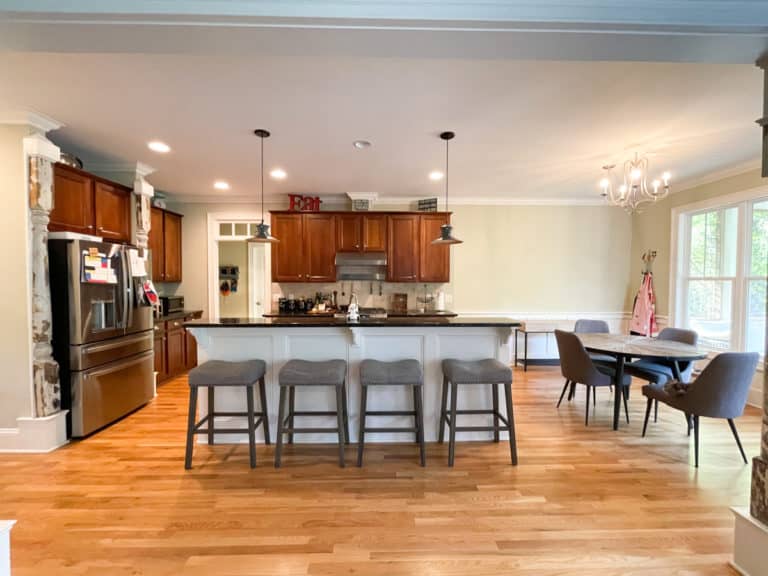
Before The Remodel
The goal was not to touch the current kitchen until the cabinets were on site and all accounted for. I will forever and always recommend this. Initially, the cabinet manufacturer said they would come early, and eventually came 2 weeks late. If we had gotten antsy, we would have been without a kitchen for an additional 3 weeks. No thanks...
For reference here is the kitchen before the remodeling process even started...
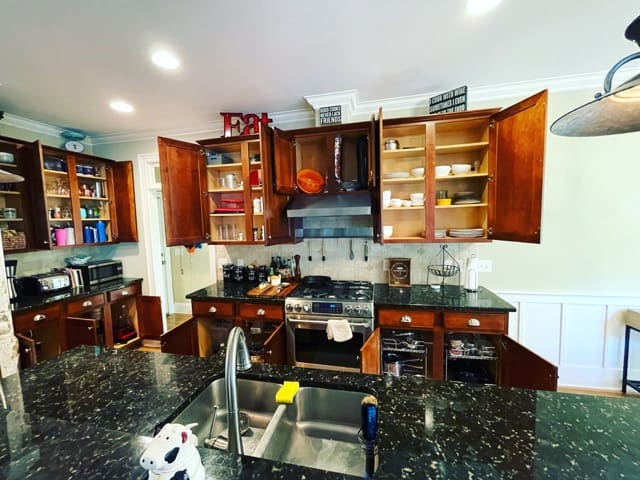
Step 1: Cleaning Out The Old Kitchen
The very first step was getting everything out of the kitchen. That meant finding a place for it to go. We made some space in our dining room, guest bedroom & garage. We used Costco & old Amazon boxes and just tried our best to consolidate. I also took the opportunity to get rid of anything old, broken, or mismatched that I knew I didn't want. The less stuff we have, the less space we need.
We used the dining room as our mini kitchen where we set up the toaster, microwave, crockpot (with disposable liners), paper plates, plastic silverware, and napkins. This also helped get us through the 6 weeks it took until we had enough of a kitchen back that we could cook in.
Step 2: Demo
What I think a lot of people forget, is demo day is more than just ripping down cabinets. It's backsplash, lighting, and HVAC. Depending on the size of your kitchen renovation, plumbing & electrical might also come into play. Our contractors needed to turn off the power to the kitchen as there were two outlets on the island that was in the backsplash/bar height transition that needed to be removed. We also needed the plumber to cap off the sink and disconnect the dishwasher.
If we were doing this process by ourselves this is 100% something I would have forgotten to plan for. When our General Contractor let us know the electrical would be out today, I was like "Ohh, yeah. Makes sense". So, plan accordingly.
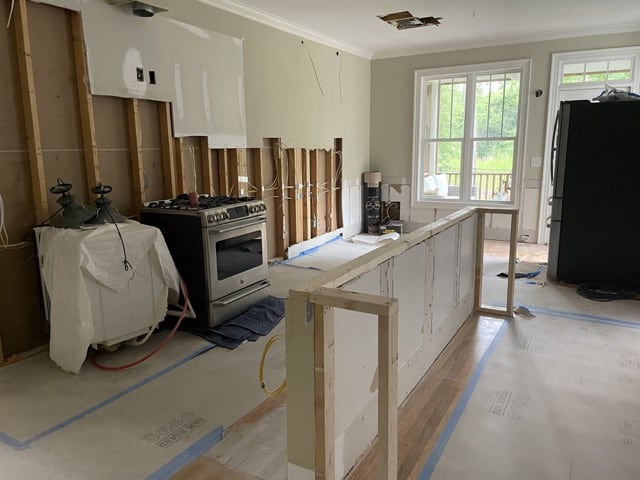
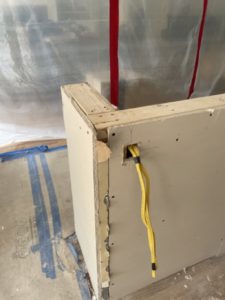
Step 3: Framing, Electrical & Plumbing
Now we left all the appliances exactly where they were, outside of shifting the stove a few inches to the right. SO HVAC (the hood) wasn't a big piece of the puzzle yet. However, by dropping down the bar height on the island to countertop height, we had to redo some re-framing to support the countertop overhang.
The electricians came in next. I knew I added more lighting but I was not prepared for the number of holes in my ceiling. We added a 3rd pendant due to lengthening the island and then had to recenter the other 2 to make them all evenly spaced. We also added under-cabinet lighting, and lights to go inside the upper-upper cabinets. BOOM... many many many many holes and drywall repair. Oops.
One fun addition is we added electrical outlets to the back of the pantry cabinets so we could use them as a charging station and microwave outlet. That was one of the best ideas we had and I'm still 10/10 loving it.
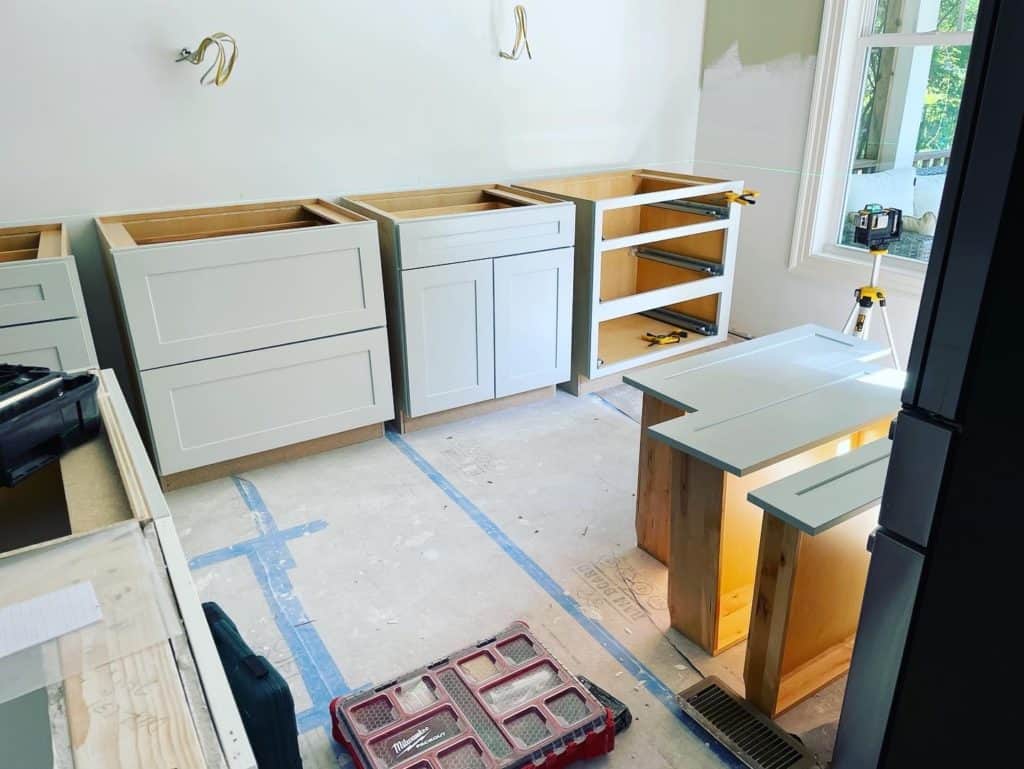
Step 4: CABINETS!!!
I was a solid 10/10 the day they came to start installing the cabinets. It had been 2 weeks of no kitchen and just prep work, and I wanted so badly to see the kitchen really start coming together.
Base cabinets went in on days 1-2, and upper cabinets & pantry cabinets on days 3-4. Not going to lie... I was so afraid I would hate the color I picked. It had been weeks since I'd seen it and I was triple guessing all my choices. But even to my surprise, I loved it even more than I thought I would. Thank goodness.
We picked the cabinet company Homecrest in the color Iceberg. I knew I didn't want white. I didn't want grey. I wanted something slightly warm, but also clean. I didn't want to spend an extra $5K+ for custom-painted cabinets, so... Iceberg it was. They have been up for more than two months now and I'm still very much in love.
Step 5: Countertops
We went with a quartz counter that mimics the look of marble. I've made the mistake of Carrara Marble before... I won't do it again. It etched no matter how much I sealed it and was basically ruined 6 months in.
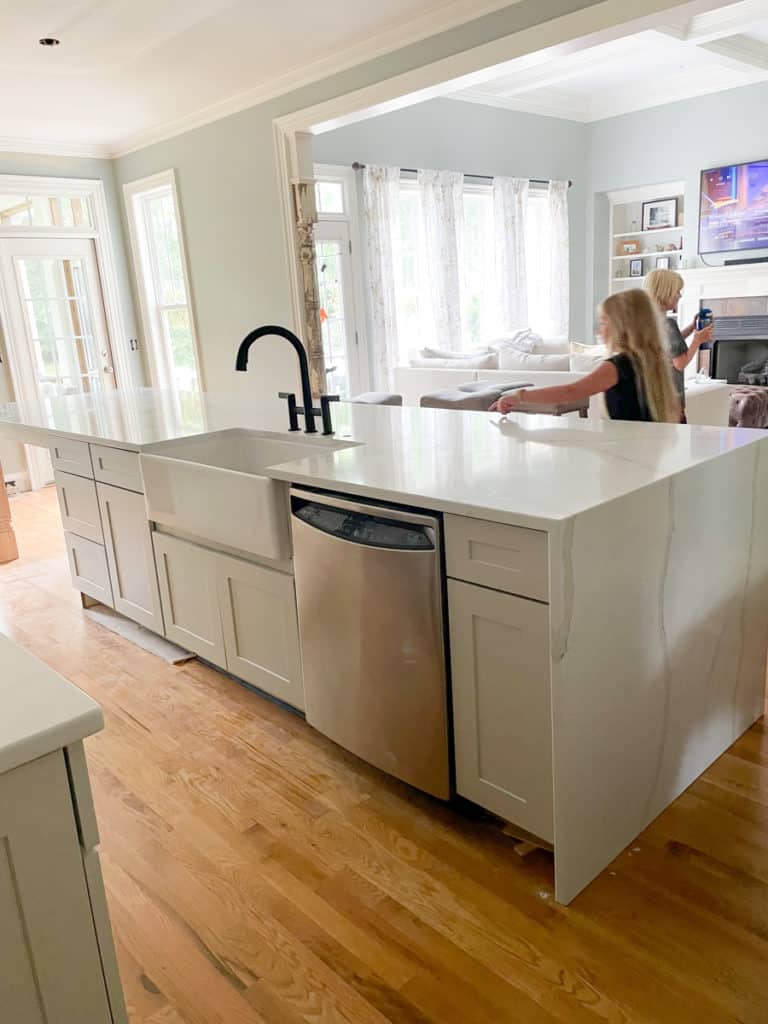
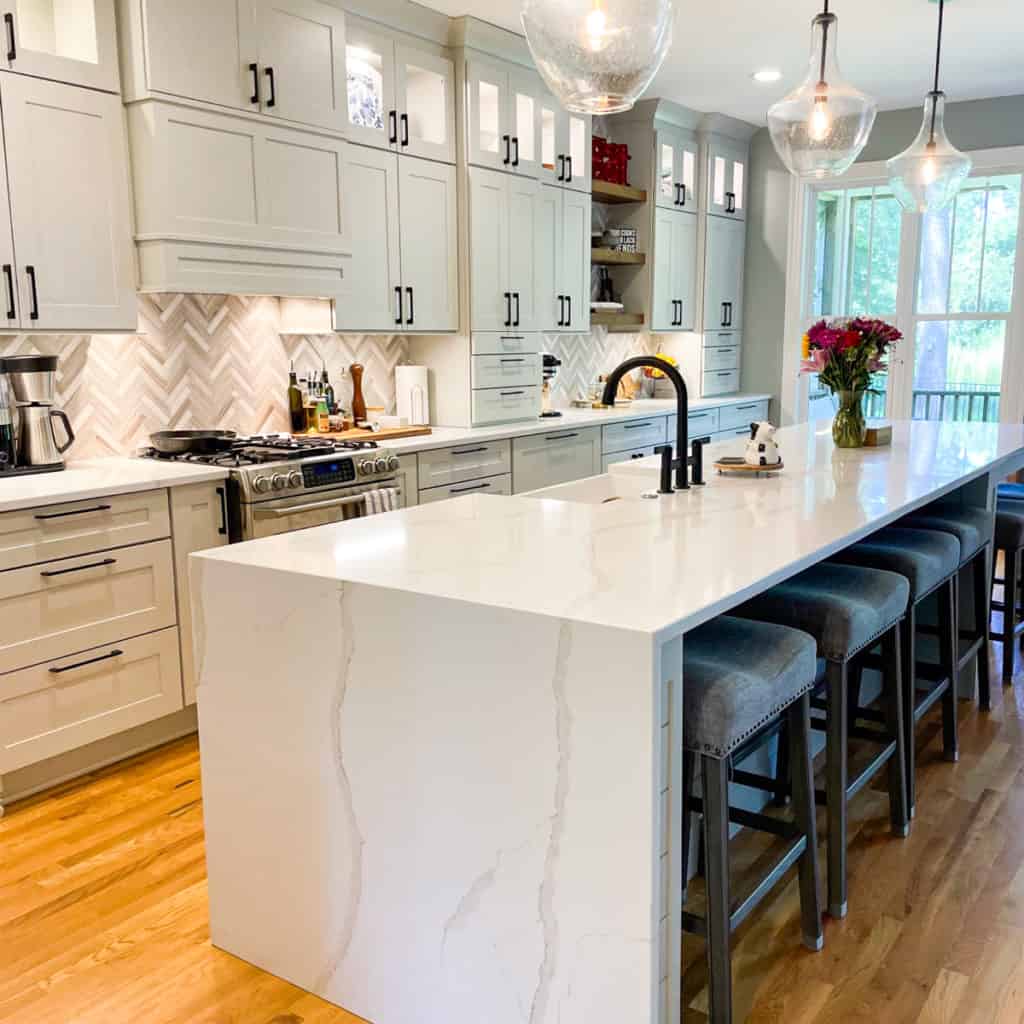
Either way, these new beautiful counters were installed in 1 day. One of the biggest changes to the kitchen (mid-process) was to the island. We added the waterfall edge which OH MY GOSH is stunning, and I have absolutely no regrets. Note the way they matched the veining *gasp*. Just so perfectly perfect.
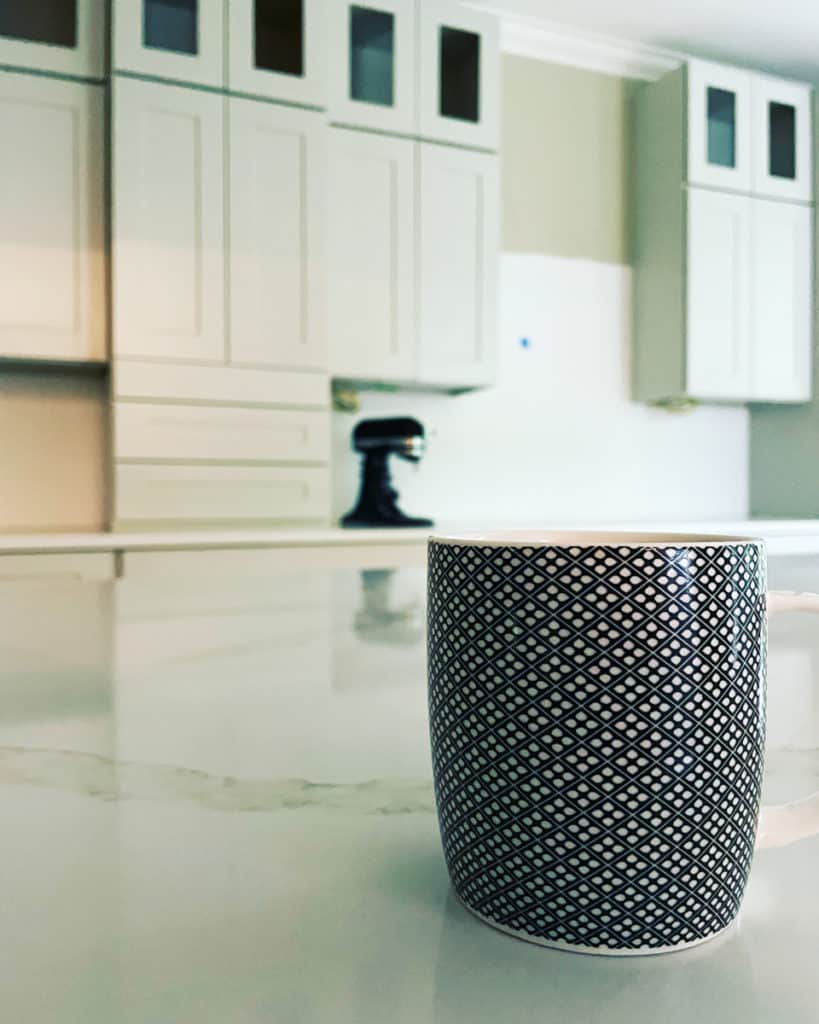
Step 6: Paint
We chose Magnetic Grey by Sherwin Williams which is also the same color in our living room, foyer & dining area. It's all pretty open to each other and we decided to keep it consistent. The only hiccup was out of the 2 leftover cans I had, 1 was for sure a different shade. Our best guess was that they came from two different stores, but Sherwin-Williams was awesome and gave me a whole new can of paint for free. I had to re-cut everything, but I wasn't also out $50.
Also, sneak peek at the backsplash 😉
Step 7: Hood, Trim, Hardware & Crown
This literally all got done the same day, by the same guys. Our hood was an insert-style 1,200 CFM beast *uncontrollable giggling* which means it mounts inside a cabinet designed to hold it. While Amazing Man A was installing that, Amazing Man B was putting in the base trim, ¼ round, and baseboard that had to be removed. Teamwork makes the dream work, and I LOVE productivity.
At this point, we were so close I could taste it 😉
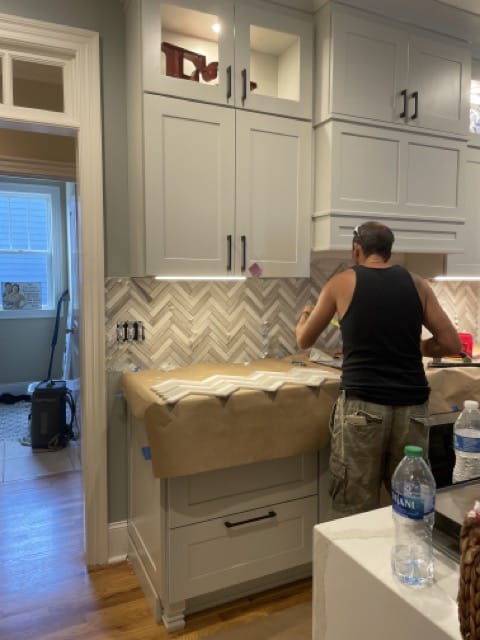
Step 8: Backsplash
This will be the 1st out of 3 kitchens where we actually are having the backsplash done at the same time as the rest of the kitchen. We always pushed it off as something we would "do later". In house #1 we put up the backsplash and moved 6 months later. House #2, didn't even stay long enough to put it up.
Moral of the story... If you can make it happen, just get it done. It will cost less if you already have the contractors out, you won't have to patch and paint the drywall where the tile will be going, and everything will be done at the same time.
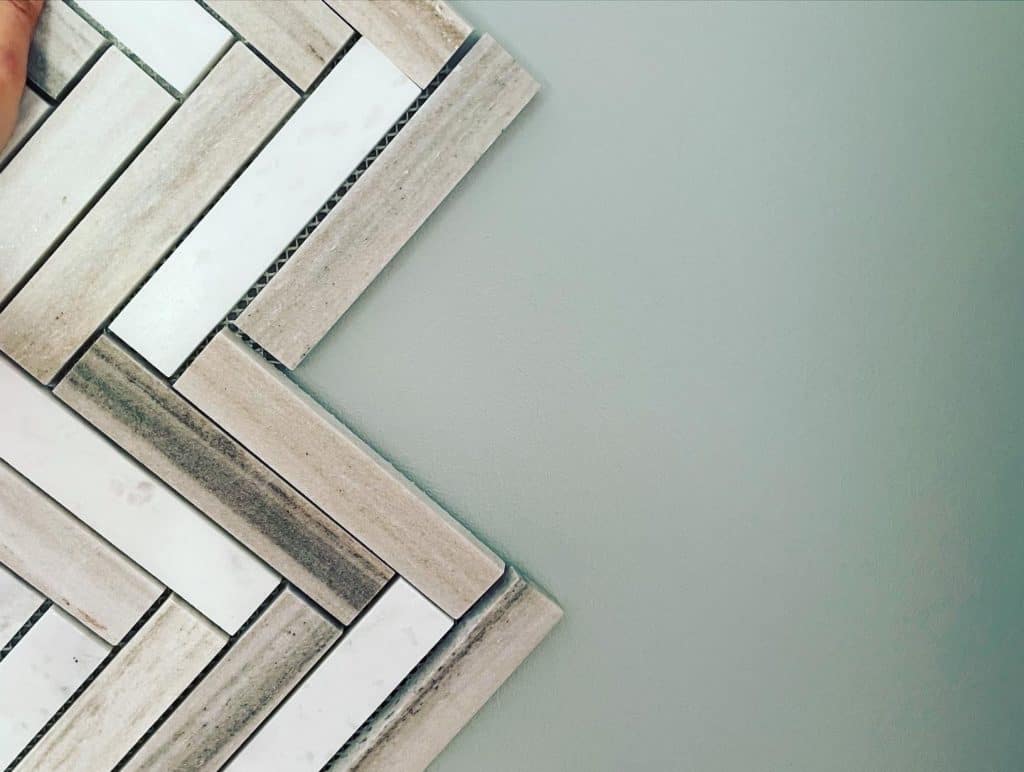
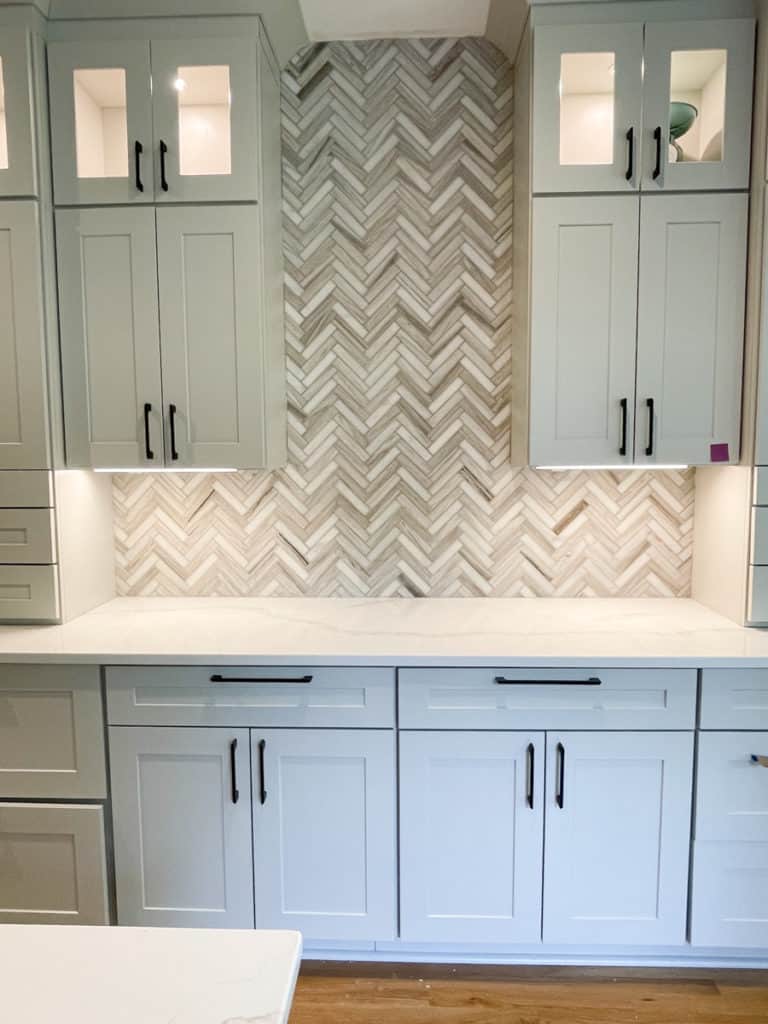
We chose a 6" X 1" marble herringbone tile that I am just obsessed with. Three pieces showed up the same day as Step 7 was happening and I squealed. Multiple times. I just... *sigh* Love it...
Step 9: Punch List & Final Touches
At this point, everything is in, but there are absolutely going to be adjustments needed. Make sure all the cabinet doors are lined up right, drawers are all sliding nicely, all the trim pieces got painted, scuff marks are removed, and then the final cleaning.
When I'm working on my own projects I'm the queen of "I'll fix it as soon as I get ____ done" and then it forever and always stays that way. This is one of the biggest reasons I am thankful we used a contractor. I can point, and he will make it right. This is also the point I am thankful I did my research and picked the right contractor, as punch list items can often be bailed on by shady contractors.
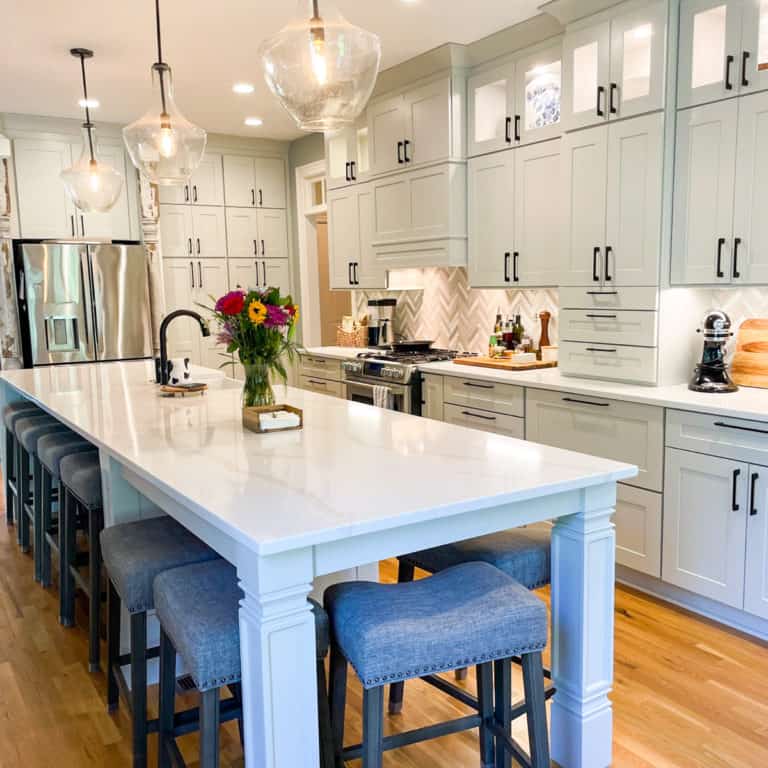
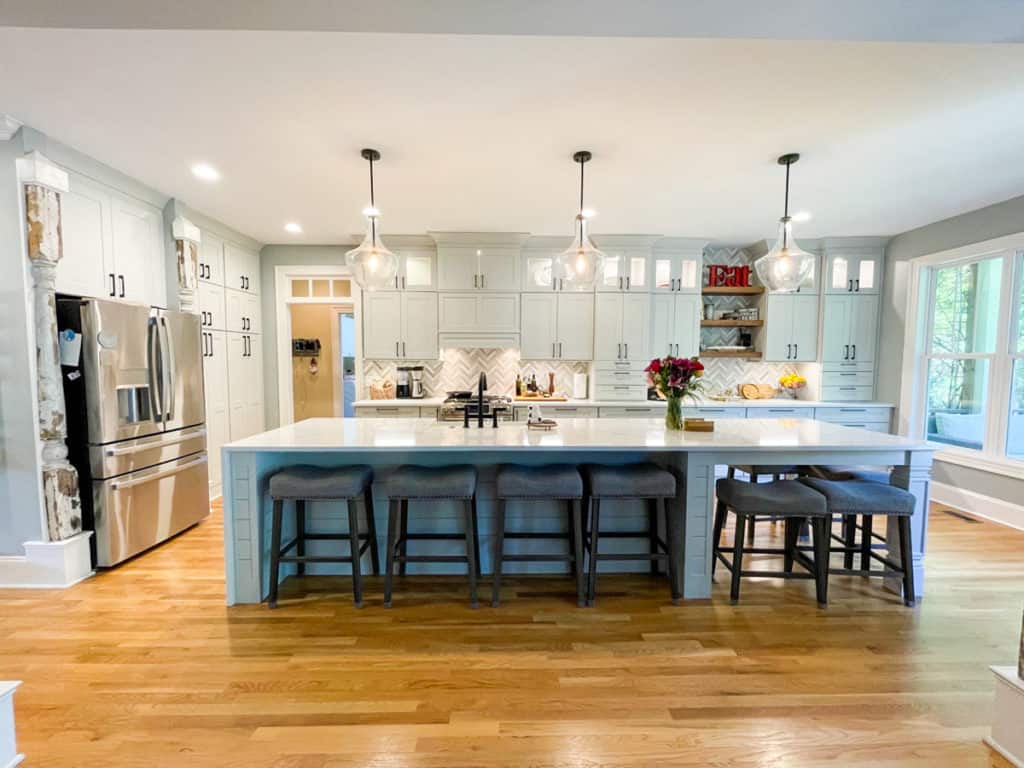
Step 10: Putting Everything Back & Enjoying Our Newly Renovated Kitchen
My husband Jon and I fought more about where to put everything back than we did about the entire renovation. This seems to make sense though as the first fight we ever had was over a filing cabinet. Now that we've officially kicked out all the contractors we literally couldn't be happier. I knew what this kitchen could be. I had a vision. Not everyone saw it, but I could.
We doubled the size, added twice as many cabinets as before, and have so much more storage, and an unbelievable amount of counter space. There are now EIGHT barstools, including the "eat-in" section which is where I am writing this blog post. I am just sitting, still gawking at the beauty of it. Happy.
Kitchen renovations are not for the faint of heart. I've lost count of how many emotional breakdowns I've had. We ate out WAY too much. The house was perpetually dusty. In the end... it was worth it.
I hope this helped in some way as you plan, dream, or prepare for your new kitchen.
Final Cost
We went over our original budget (story of my WHOLE life). In the very very beginning, we had planned on a budget of about $35,000. That plan had no upper-upper cabinets, no backsplash, and no waterfall edge. We would have managed the whole project and it most likely would have taken longer to complete. The finishing touches/punch list would have gone unfinished for months (years, let's be honest).
Our final total cost came in at around $60,000. Yup, $25,000 over budget. Now let me justify it for myself you.
~$6,500 - Hired a General Contractor to handle all the nuts & bolts so we could actually enjoy our summer & renovation.
~ $4,000 - We added upper-upper cabinets.
~ $2,500 - Added under cabinet & in-cabinet lighting for the upper-uppers.
~ $4,000 - Put in a backsplash now vs waiting years.
~ $1,000 - Painting/Patching (which I was going to take on myself originally)
~$1,500 - Waterfall Edge
~$500 - 1,200 CFM hood vs 800
~ $5,000 - I'm sure something nice, I've just lost track.
Basically, we just made the scope of work significantly bigger so it would be exactly what we wanted, and done all at the same time. There we other odds and ends that got thrown in as well but that is basically the nuts and bolts of it. Also, while the total cost is 100% accurate, the additional costs are approximated.
Wrapping Up
We are so elated with the final results and so proud that the future of Tabetha's Table will be right here. I really hope you guys stick around to see what we cook up over here and thanks for making it to the end of this very long post. Check out the videos of the whole process below!
Cheers,
Tabi


Comments
No Comments