
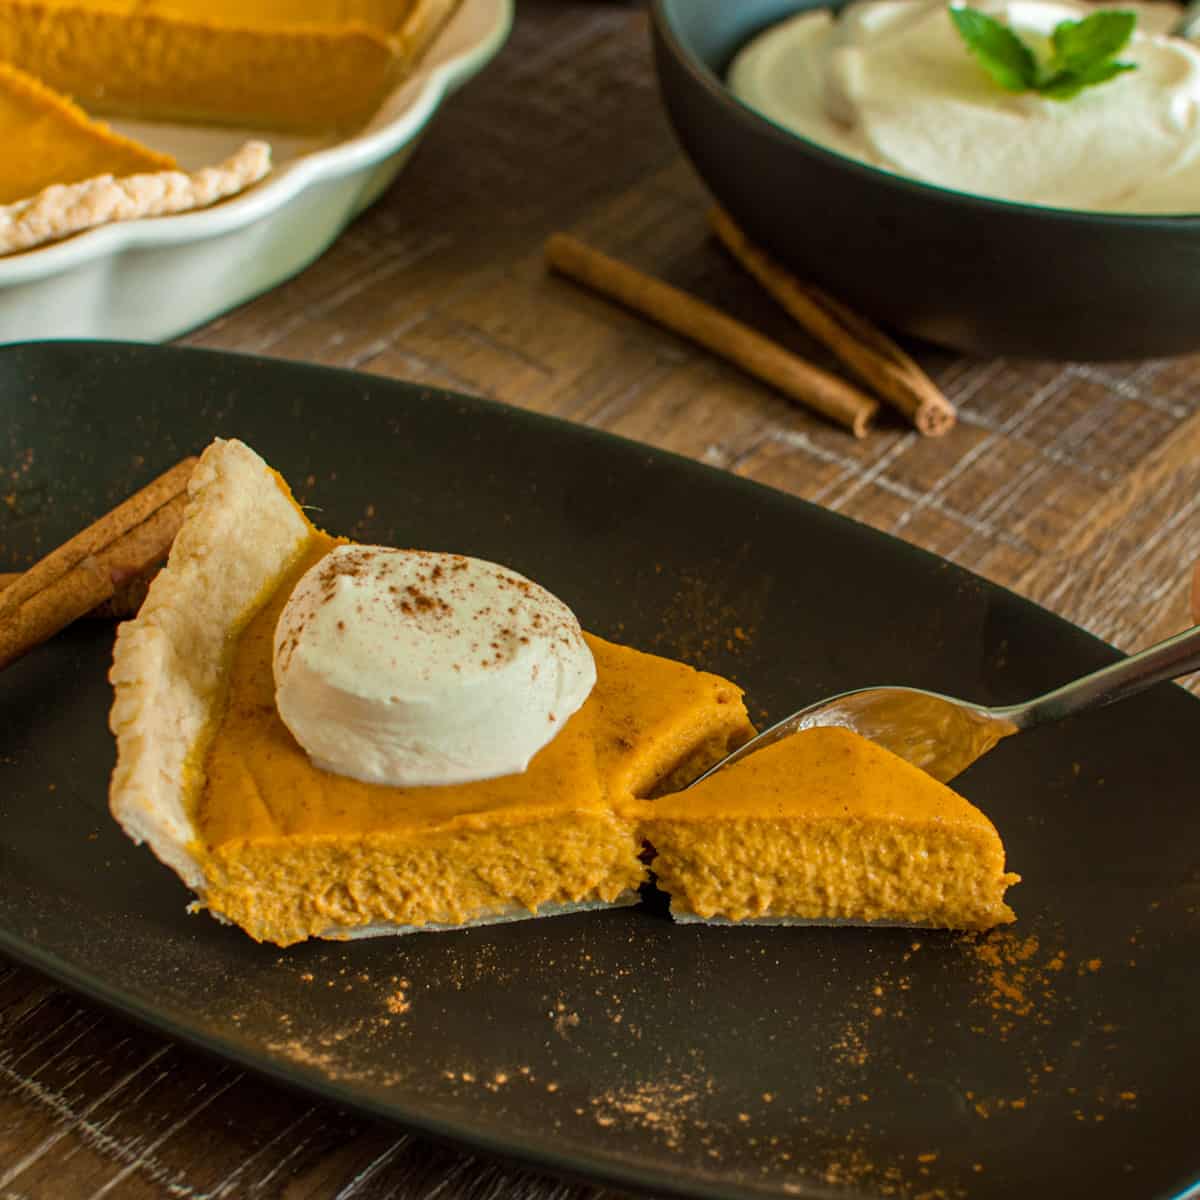
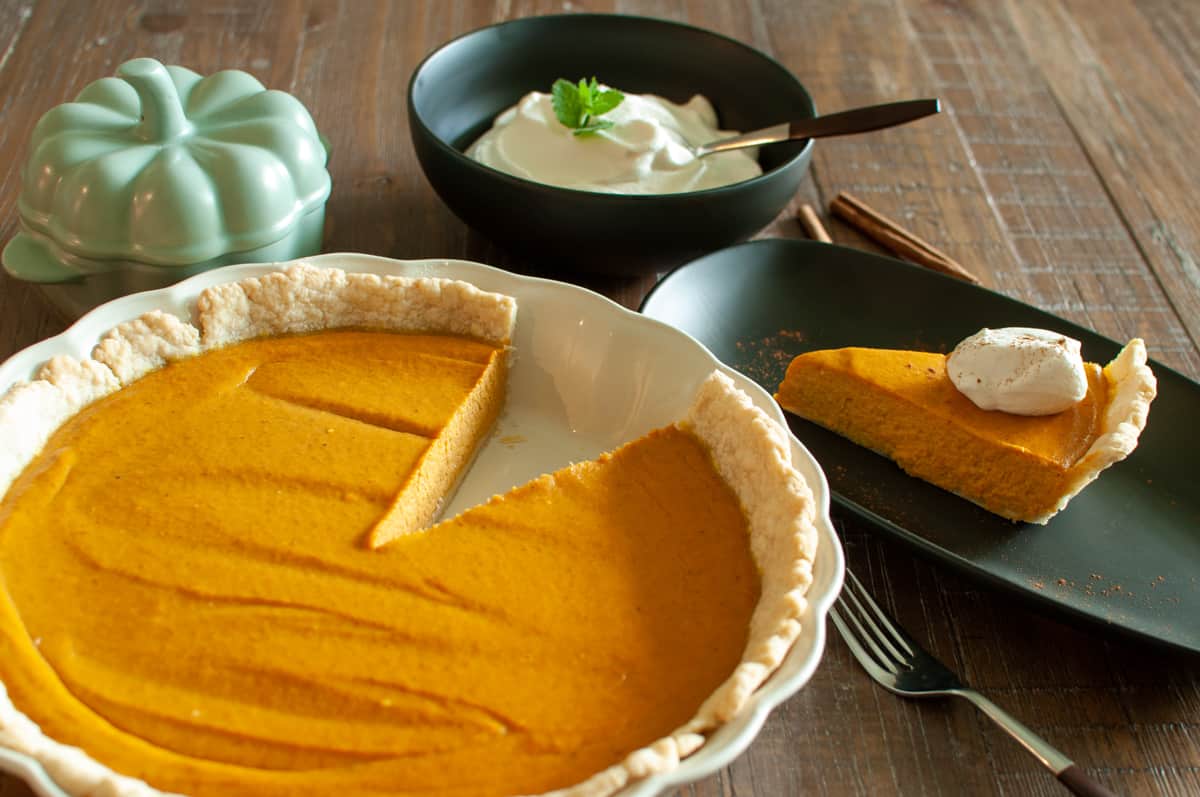
Pâte brisée is one of those recipes that makes you look like you went to culinary school - and in my case, I actually did. It's the flaky, buttery French pie crust I reach for again and again, and once you make it from scratch, the store-bought stuff is dead to you. It's our go-to crust for our family's favorite pumpkin pie recipe, and the technique is pure French pastry. Don't let the fancy name scare you off, though - it's really just flour, cold butter, and a little patience. Whether you're filling it with something savory or sweet, this is the one crust recipe worth committing to memory.
Why This Works
- Cold butter = flake. Keeping the butter near-frozen means it melts in the oven, not in the bowl, leaving steam pockets that puff into flaky layers.
- A splash of lemon = tenderness. The acid shortens gluten strands so the crust stays melt-in-your-mouth instead of tough and chewy.
- Minimal handling = a short crumb. Touch the dough as little as possible and you keep that tender, crumbly bite that makes pâte brisée special.
Jump to:
Ingredients
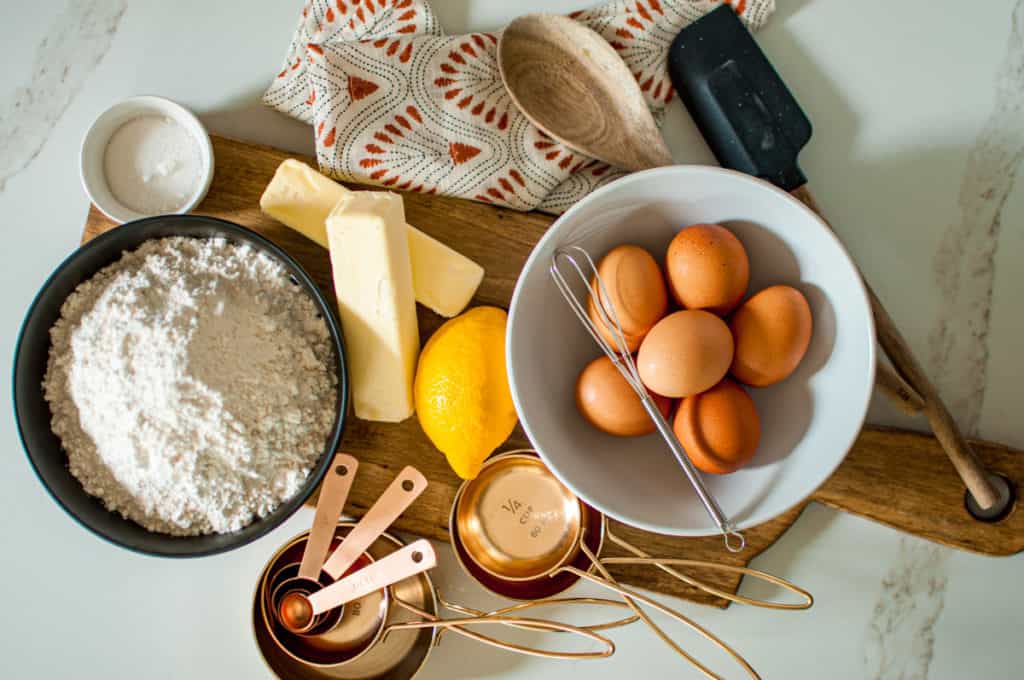
Purpose Flour: 3 cups (360g) of all-purpose flour, the foundation of the crust.
Sugar: 1 tablespoon (12g), just enough to balance the flavors.
Salt: 1 teaspoon (6g) to enhance the taste.
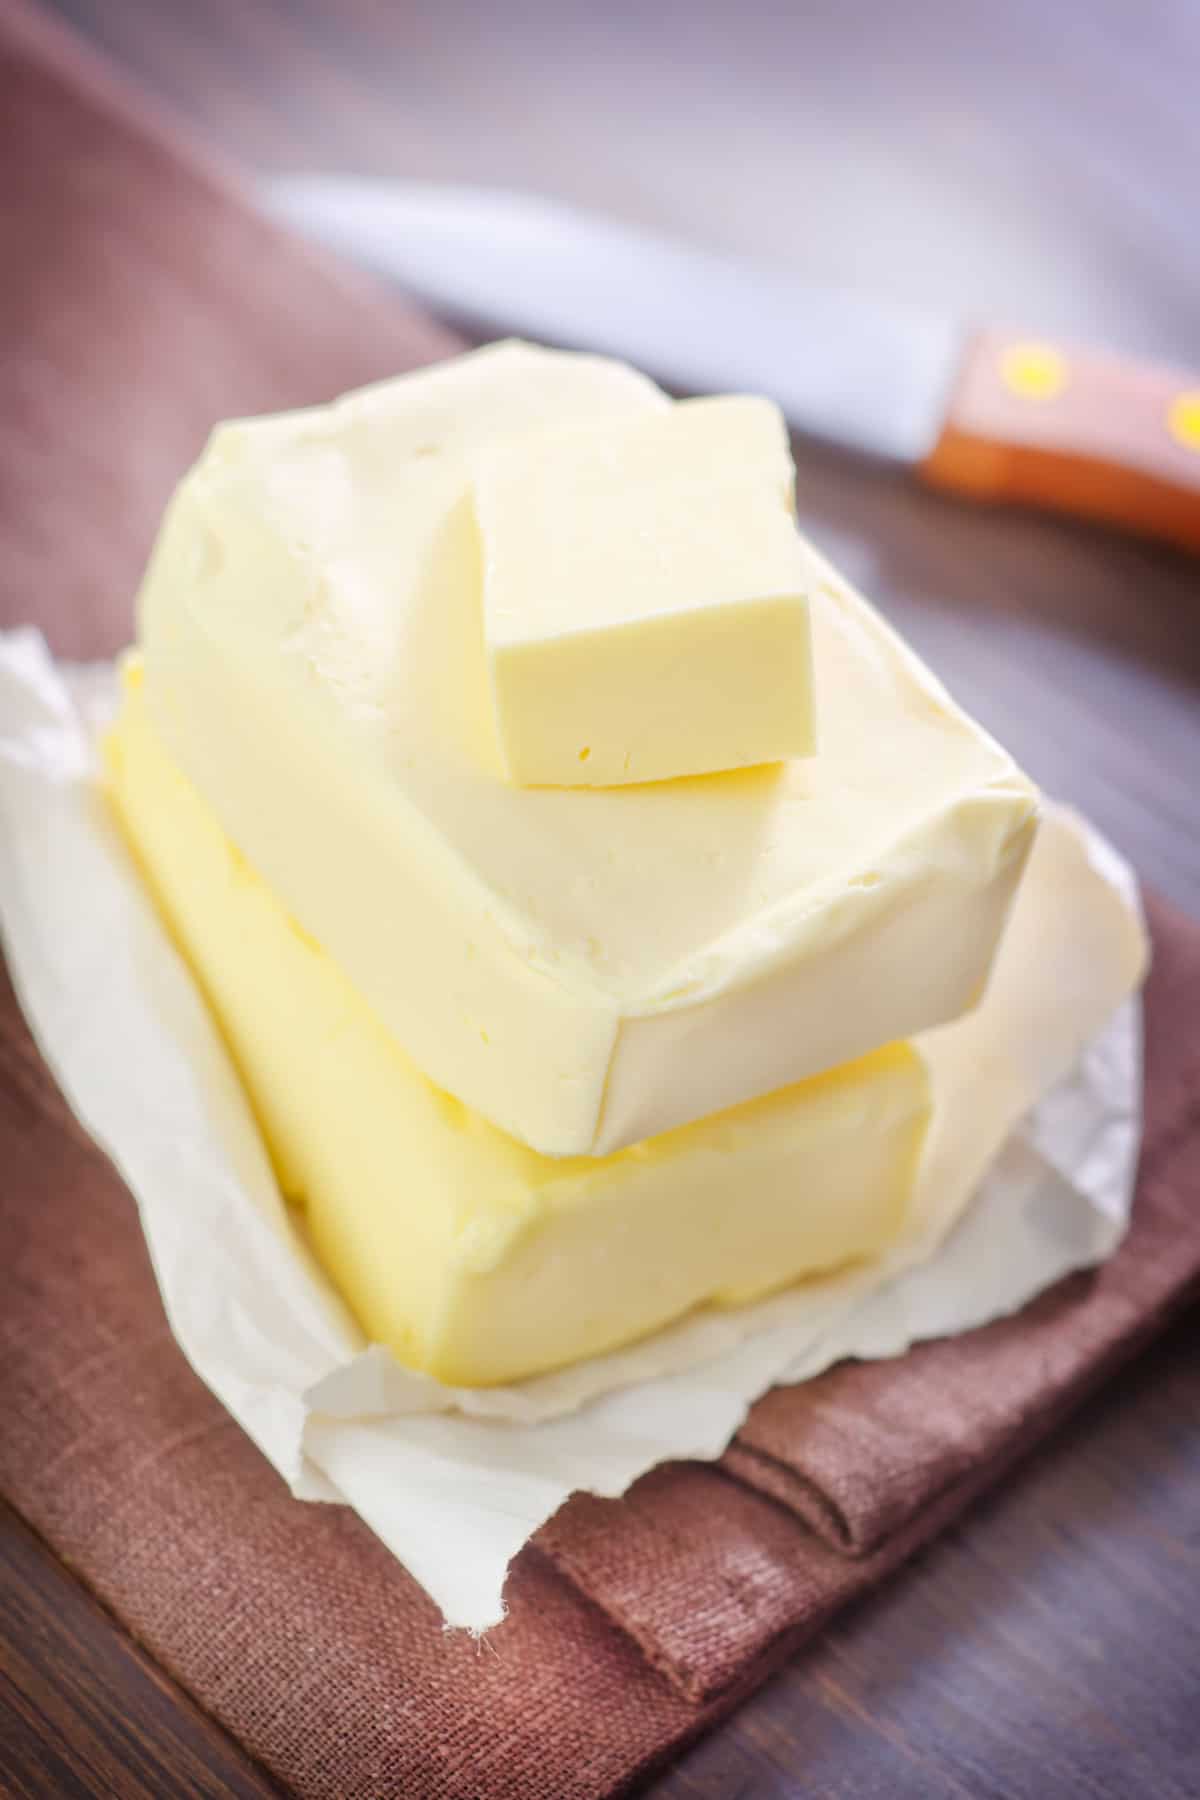
Unsalted Butter: 1 cup (2 sticks, 227g) - super cold. We freeze ours ahead of time for the coldest possible butter, perfect for a flaky crust.
Egg Yolk: 1 yolk, to enrich the dough.
Water: ½ cup (120ml) - Super cold ice water is best, to bring the dough together without developing too much gluten.
Lemon: 1 teaspoon, for controlling gluten development and adding a subtle brightness.
Equipment
Large Mixing Bowl: The starting point for mixing your dry ingredients.
Grater (KitchenAid or Handheld): For achieving small consistent butter pieces.
Pastry Blender or Metal Blade: If using a food processor, these tools help achieve the right texture.
Rolling Pin: For rolling out your dough to the perfect thickness.
Tart Pan or Pie Plate: Depending on what you're making, have the right pan on hand.
Wire Rack: For cooling your crust to perfection after baking.
Food Processor: Optional, but can make blending the butter and flour a breeze.
Pie Weights: Optional, but needed for blind baking if you're pre-baking the crust.
Preparing the Dough
In a large bowl, combine flour, a tablespoon of sugar, and a teaspoon of salt. These dry ingredients will form the base of your pastry dough.
Working with Cold Butter
Critical step! In our kitchen, we take the butter preparation seriously to achieve the perfect texture. We freeze our butter ahead of time to get it as cold as possible. Then, we grate it using the grating attachment on our KitchenAid, a method that ensures uniform, pea-sized pieces of butter.
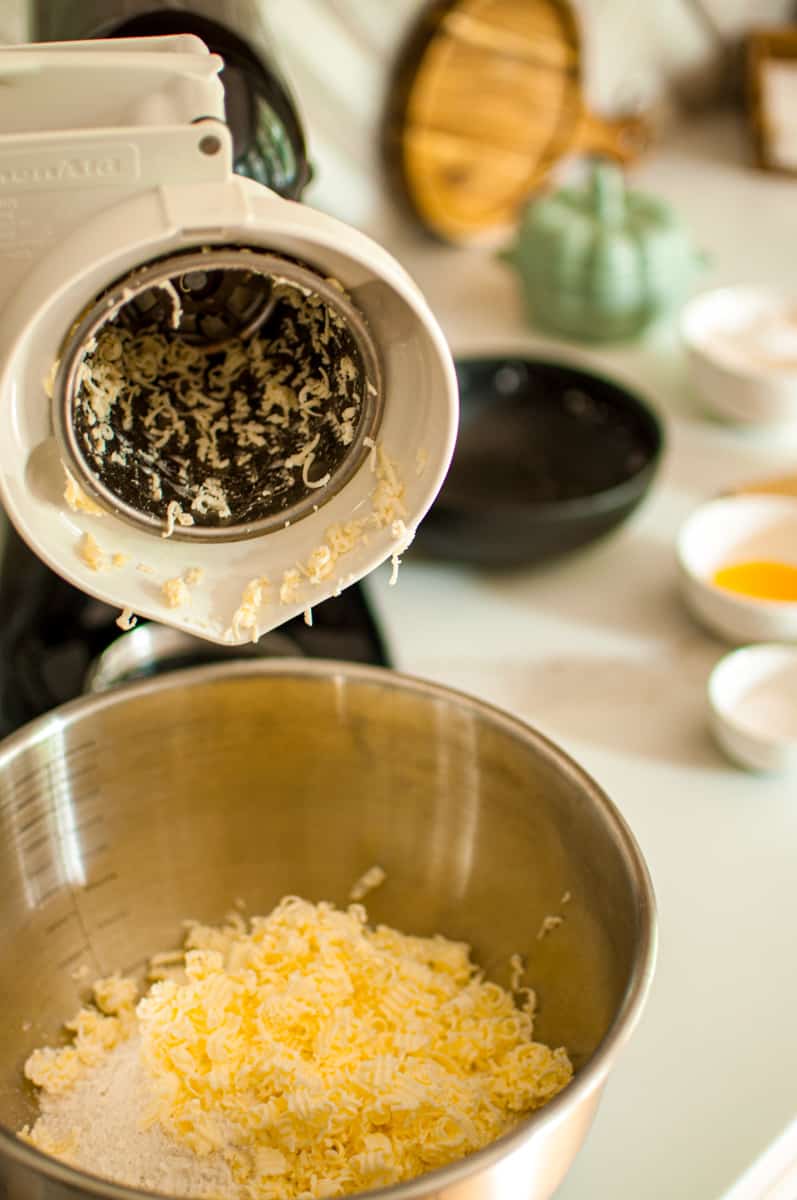
If you don't have a KitchenAid, you can also cut the butter into very small pieces or freeze and grate it with a hand-held grater. Once you have your cold, grated butter ready, add the butter pieces to the flour mixture.
Creating the Dough
Add the butter mixture to the flour mixture. Using only your fingertips or a pastry cutter, work the butter into the flour until it resembles coarse crumbs. Create a small well (small hole) in the center for the wet ingredients we will be adding next.
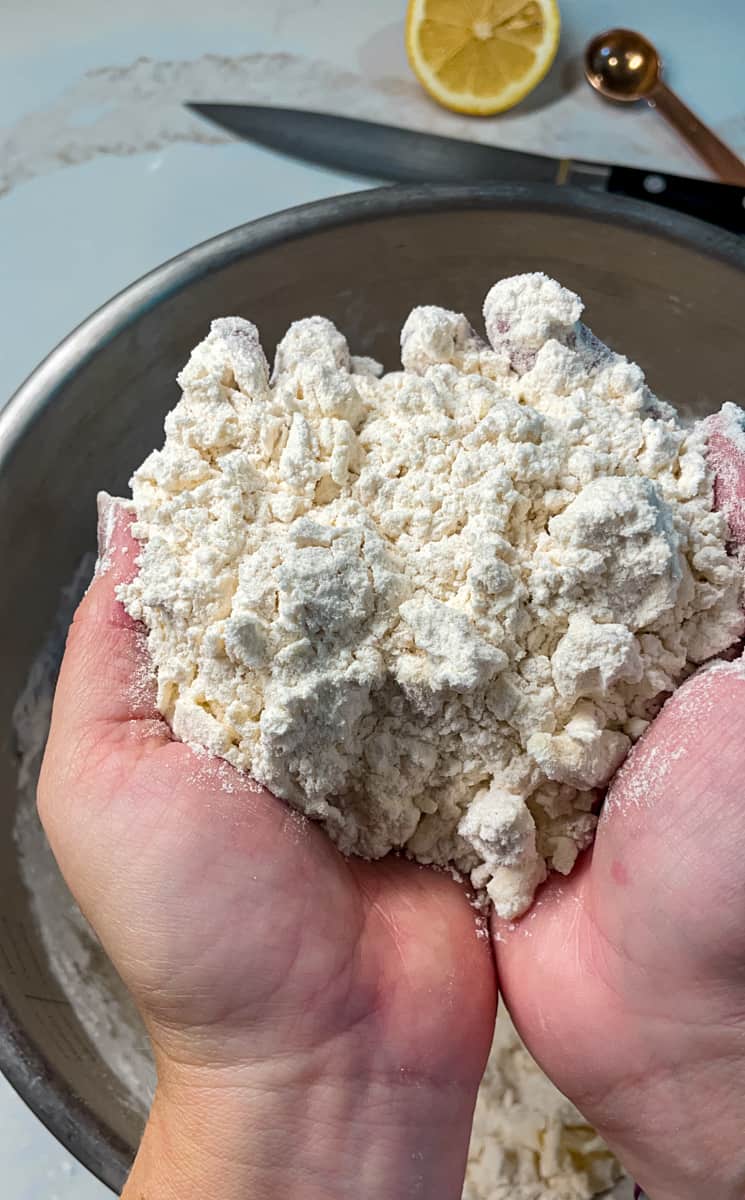
A food processor is also a good option to incorporate butter into the flour. Pulsing slowly to make sure to not overwork the mixture.
Combining Wet Ingredients
In a small bowl, separate your egg yolk and combine it with ½ cup ice water and lemon. Add your wet ingredients to the well you created, and slowly mix in the surrounding flour.
Remember we want to touch the dough as little as possible so as not to transfer too much heat from our hands to the dough, melting the butter.
If your dough is too shaggy and isn't coming together, add a small about of water to your hands, and continue to work it together until it forms a dough ball.
Wrapping and Chilling
Cut the dough ball in half as this recipe is enough for 2 - 9" pie pans. Lay down a layer of plastic wrap, add your dough, and smush it into thick disks. Chill for at least an hour in the refrigerator.
You can leave this dough in your fridge for 2 days if needed, or freeze it for up to 3 months to use at a later time.
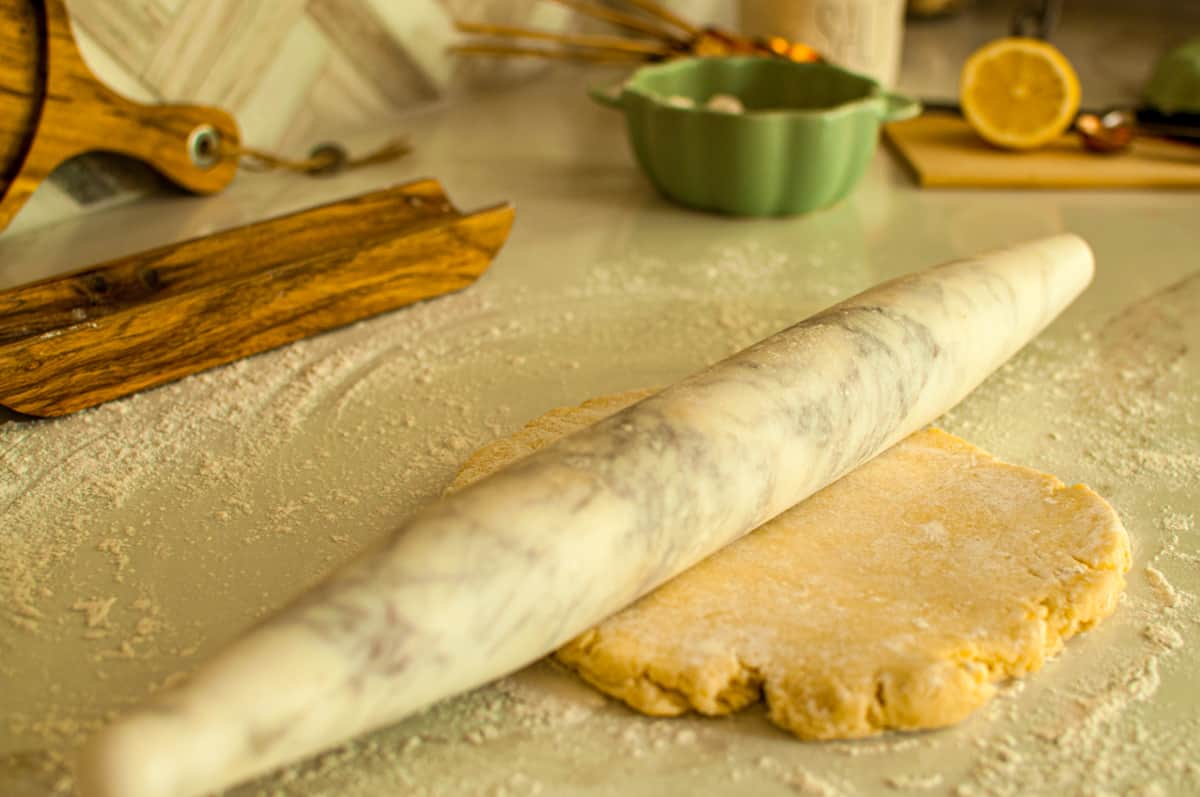
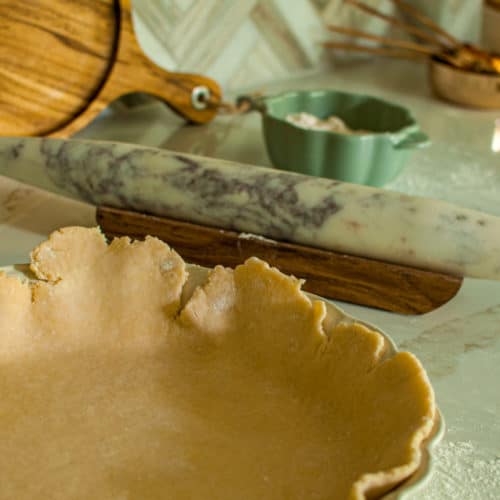
Rolling and Baking the Pâte Brisée
On a floured board, and with a floured rolling pin, roll out the chilled dough. Keeping in mind that it may be too firm to roll out as soon as it comes out of the fridge as the butter has firmed completely.
It's too cold you may find it cracks, so give it a little time on the counter to acclimate.

Filling the Tart or Pie Shell
Place the dough in a tart pan or pie dish. The need for blind baking depends on the type of pie or tart you're making:
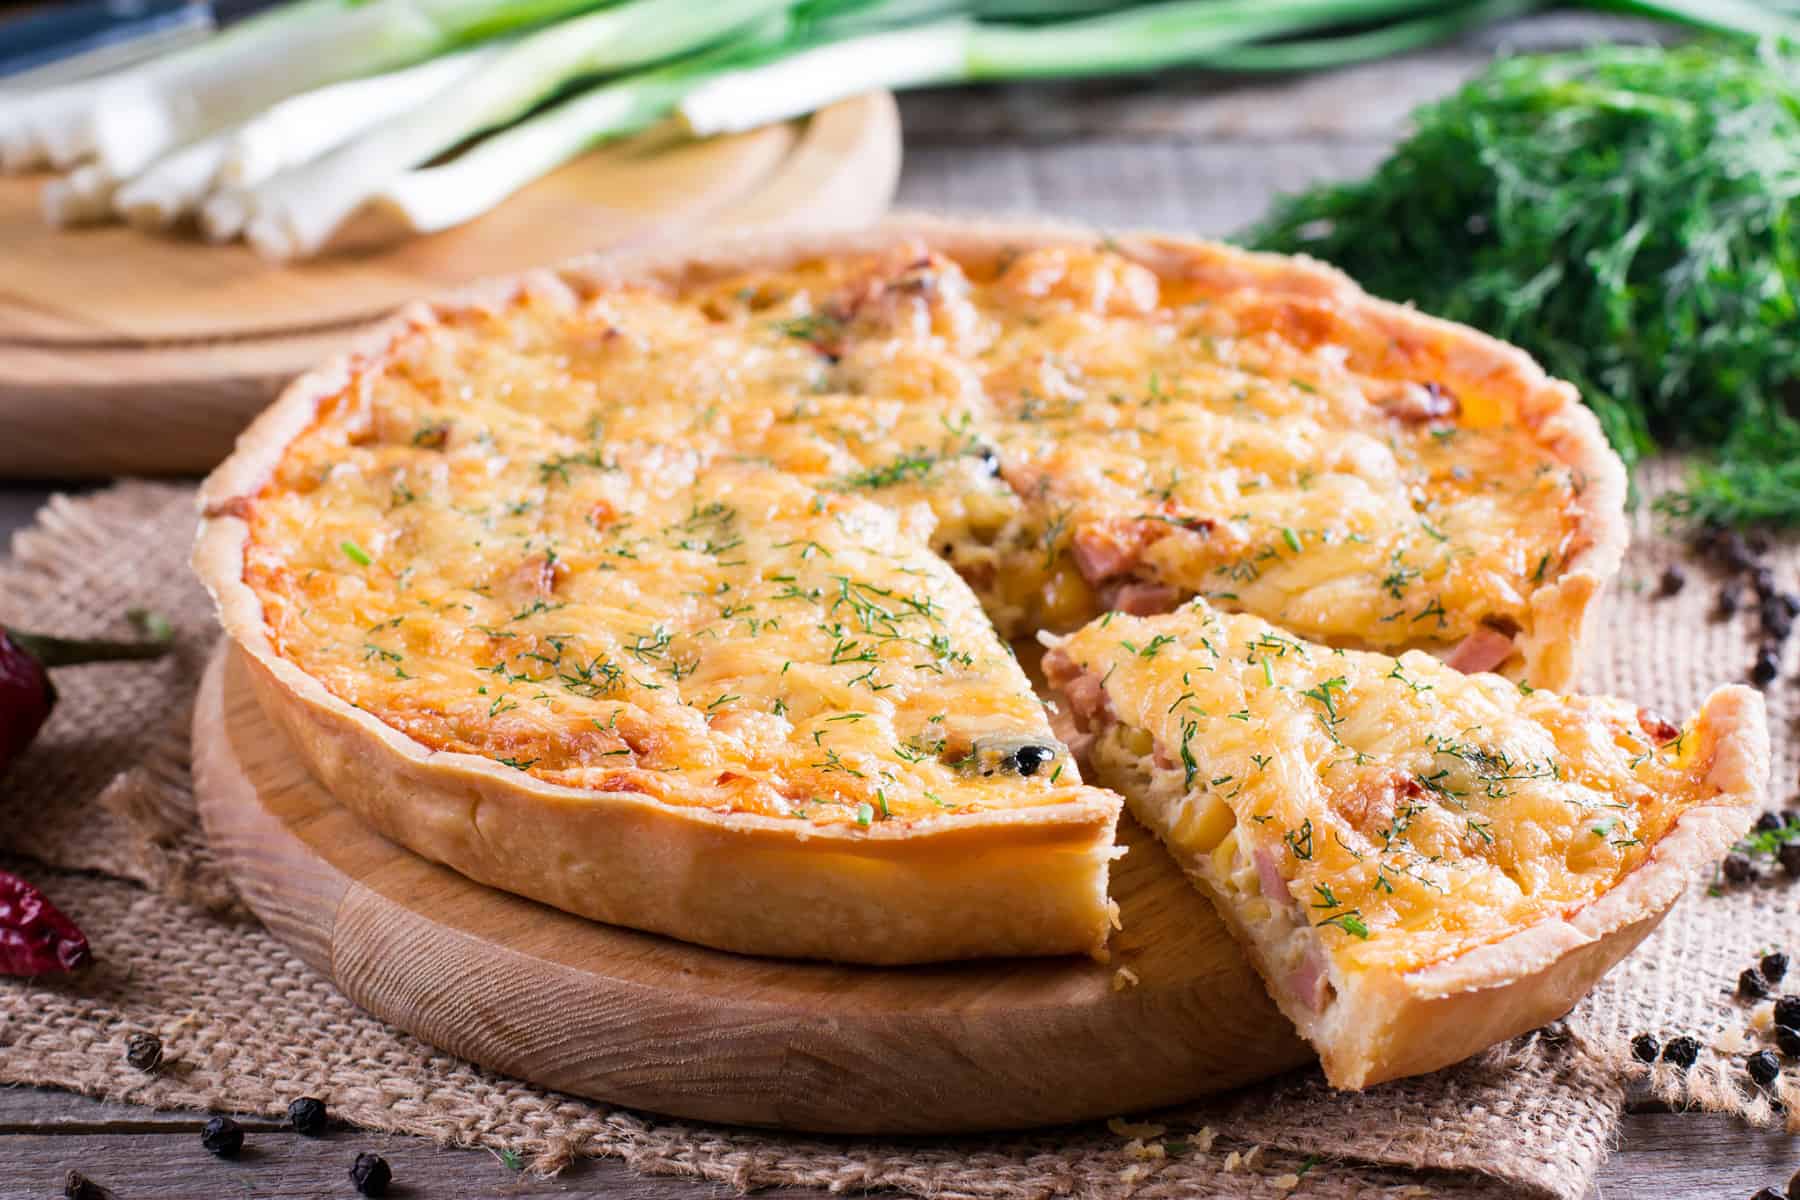
- Blind Bake Required: For pies and tarts with moist fillings that don't require long baking, or for fillings that are cooked separately, blind baking is essential. This includes quiches, lemon tarts, and some custard or cream-filled pies. Blind baking ensures that the crust is fully cooked and won't become soggy when the filling is added.
- No Blind Bake Needed: For pies with fillings that bake along with the crust, like traditional apple pie, pumpkin pie, or other fruit pies, blind baking is generally not required. The crust and filling bake together, allowing the flavors to meld and the crust to cook evenly.
If you are making a tart shell or pie shell that requires blind baking, use pie weights to prevent the crust from puffing up or shrinking as it bakes.
Blind Baking Instructions
- Preheat the Oven: You'll want to preheat the oven to around 375°F.
- Prepare the Crust: Line the pie crust with parchment paper or aluminum foil, making sure to cover the edges to prevent over-browning. Fill with pie weights, dried beans, or uncooked rice to keep the crust from puffing up.
- Bake with Weights: Bake for about 15-20 minutes with the weights. This sets the crust and helps it hold its shape.
- Remove Weights and Continue Baking: Carefully remove the parchment paper and weights, then return the crust to the oven. Continue baking for another 10-15 minutes, or until the crust is golden brown and fully cooked.
- Cool Before Filling: Allow the crust to cool completely before adding your filling, especially if it's a no-bake filling like a cream or custard.
Filled Baking Instructions
Each pie or tart recipe is going to be different depending on what filling you've selected. We suggest following your specific recipe as far as baking temperatures and times. For example, our pumpkin pie recipe bakes for around 45-50 minutes.
Video
Making Ahead and Freezing for Later
Life in the kitchen can be bustling, especially when juggling family meals, new recipes, and culinary adventures. That's why making pâte brisée ahead of time and freezing it for later can be a game-changer. Here's how we do it in our kitchen:
Preparing the Dough
Follow the recipe as usual, mixing the dry ingredients, working with the cold butter, and forming the dough. Instead of using it right away, you can prepare it for freezing. Shape the dough into thick disks, as this shape makes it easier to roll out later. Wrap each disk tightly in plastic wrap, ensuring that it's well-sealed to prevent freezer burn.
Labeling & Freezing
Don't forget to label the wrapped dough with the date and type of pastry (especially if you have variations like pâte sucrée). This way, you'll know exactly what you have on hand and which to use first.
Place the wrapped dough disks in a freezer-safe bag or container and freeze. The dough can be stored in the freezer for up to three months.
Thawing and Using
When you're ready to use the frozen pâte brisée, transfer it to the refrigerator to thaw overnight. If you're in a hurry, you can also thaw it at room temperature for a few hours. Once thawed, roll and bake as usual.
Adding Lemon Juice
Lemon juice in a pie crust recipe, especially in a classic pâte brisée, might raise some eyebrows, but there's a delightful science behind this citrusy addition. The acidity in lemon juice can help limit the development of gluten in the dough.

Gluten is a protein that forms when flour and water are mixed, providing structure and elasticity. However, too much gluten can make a pie crust tough and chewy. The acid in lemon juice helps to "shorten" the gluten strands, keeping the crust tender and flaky.
Some bakers use vinegar for the same purpose as lemon juice. Both are acidic and can control gluten development, but lemon juice offers a more pleasant and complementary flavor, especially in sweet pies.
Unsalted vs. Salted Butter
Butter is the star of the show in pâte brisée - it's where all that richness and flakiness comes from. So the salted-versus-unsalted question actually matters more than you'd think. Here's how I see it:
The Salt Content
Salted butter contains varying amounts of salt depending on the brand, making it challenging to control the exact salt content in your recipe. Unsalted butter, on the other hand, allows you to add the precise amount of salt you desire, ensuring consistency in flavor.
Flavor Considerations
Unsalted butter often has a fresher, sweeter cream flavor, allowing the true buttery taste to shine through. Salted butter can sometimes mask subtle flavor nuances, especially in delicate pastries like pâte brisée.
Why I Prefer Unsalted Butter
In our kitchen, we opt for unsalted butter when making our beloved pâte brisée for pumpkin pie or any other dish. It gives me more control over the final product, ensuring that the salt level is just right. It's not just about reducing the salt; it's about crafting a balanced flavor that complements the fillings without overpowering them.
A Note for Those Using Salted Butter
If salted butter is all you have on hand, it can still be used in pâte brisée. Just be mindful of the additional salt in the recipe, and consider reducing or even eliminating the added salt to compensate.
The Art of Short Dough
Here's a little culinary school nerdery for you: pâte brisée is what bakers call a "short dough." The name sounds odd, but it's the whole secret behind that tender, crumbly bite. So what actually makes pâte brisée short, and why should you care? Stick with me.
What is Short Dough?
""Short" doesn't mean small here - in baking, short means tender. A short dough simply has a high ratio of fat to flour, and that's exactly what gives pâte brisée its melt-in-your-mouth, crumbly texture. More butter, less chew. That's the whole game.
The Role of Fat
In pâte brisée, cold butter plays a crucial role. When the butter is cut into small pieces and mixed with flour, it coats the flour particles, limiting the development of gluten. This results in a dough that is less elastic and more crumbly. Think pizza vs pie crust.
The Importance of Technique
Avoiding Overworking: Working the dough too much can develop more gluten, leading to a tougher crust. The goal is to form the dough just until it comes together, preserving those pea-sized pieces of butter.
Keeping Ingredients Cold: Using cold butter and ice water helps keep the fat solid, preventing it from being fully incorporated into the flour. This creates pockets of fat that melt during baking, leading to flaky layers.
Resting the Dough: Chilling the dough allows the fat to solidify and the gluten to relax, enhancing the short, tender texture.
Compared with Other Doughs
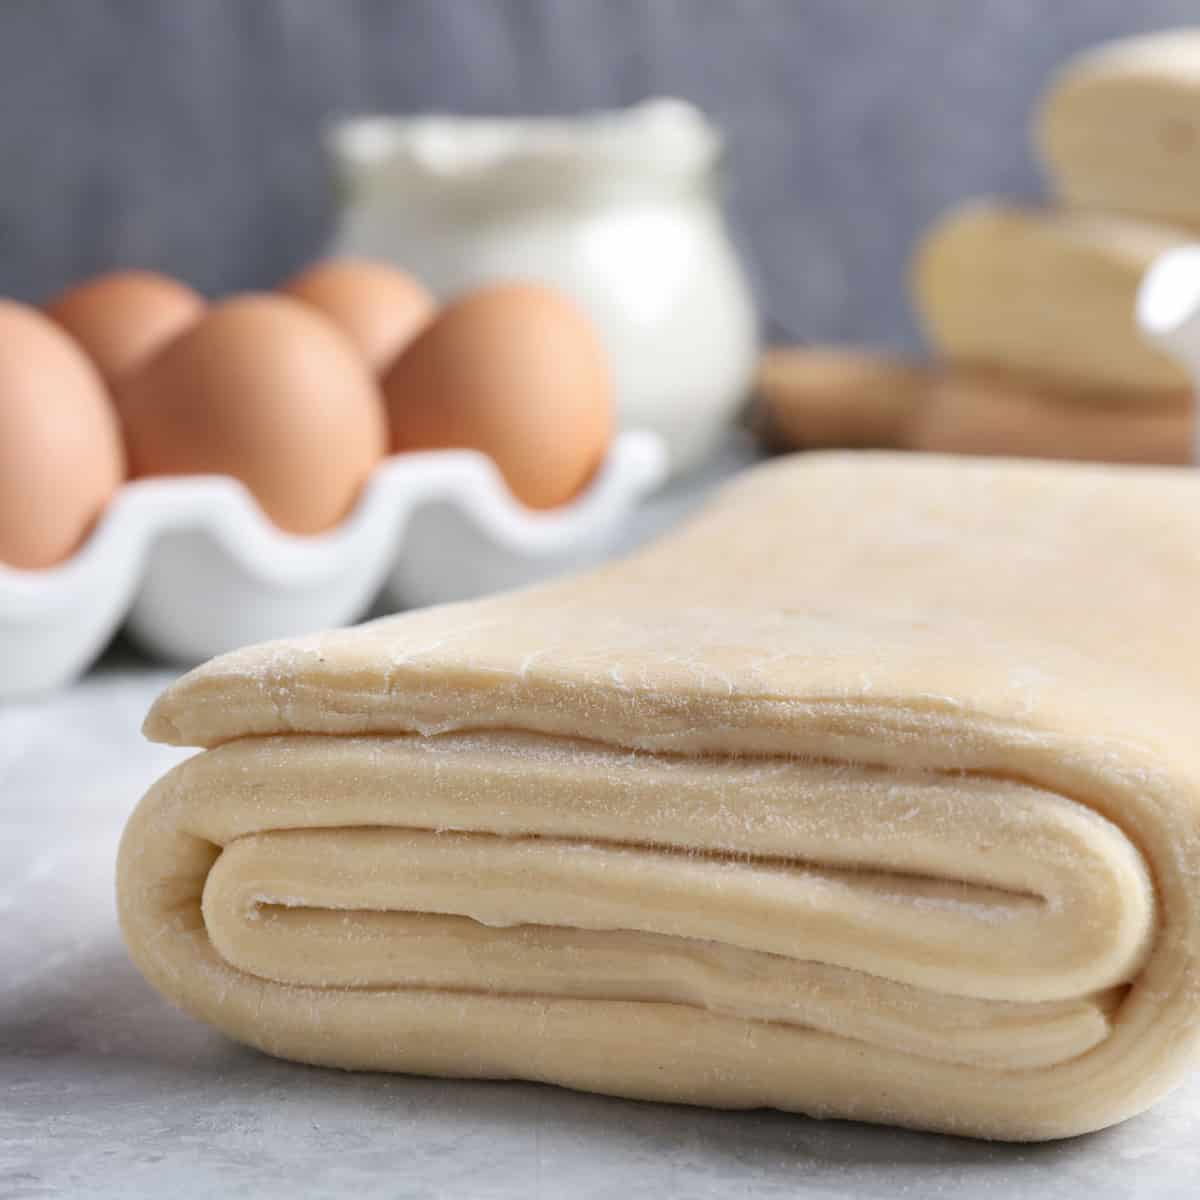
Unlike puff pastry or croissant dough, which has many more layers and a more complex folding process, pâte brisée is simpler to make. It offers a balance between the tender crumb of a tart pastry and the layered richness of puff pastry.
Understanding what makes pâte brisée a short dough adds a new layer of appreciation to this classic French technique. It's a dance between ingredients, temperature, and handling, all coming together to create a pastry that's tender to the bite yet strong enough to hold fillings. Whether you're crafting a savory tart or a sweet pie, the principles of short dough are key to achieving that perfect flaky crust.
Pairing Suggestions
Savory Pies and Tarts
Try your pâte brisée with a classic Quiche Lorraine or as a base for savory dishes filled with seasonal vegetables.
Sweet Pies
From the traditional apple pie to a delightful pumpkin pie, your flaky pie crust will be the talk of the dessert table.
Whether you're a seasoned baker or trying a new recipe, pâte brisée offers endless possibilities. From the coarse meal texture to the flaky layers, each step is a culinary adventure. Embrace the French technique, and don't be afraid to put your own twist on this classic. Bon appétit!
Frequently Asked Questions
It's "pat bree-zay." The first part rhymes with "cat," and the second sounds like "bree-zay" (think the cheese, Brie, with a little flourish). Don't let the accents intimidate you - say it with confidence and you're basically French.
Think of it as a sweetness ladder. Pâte brisée is the savory-leaning workhorse - barely any sugar, flaky, and great for both quiche and fruit pie. Pâte sucrée ("sweet dough") adds sugar and egg for a firmer, cookie-like crust that's perfect for tarts. Pâte sablée is the richest and sweetest of the three - "sablée" means sandy, and that's exactly the crumbly, shortbread-like texture you get. Brisée is where you start; the other two are dessert's fancier cousins.
Absolutely - in fact, I usually prefer it. My favorite low-tech method is to freeze the butter and grate it on a box grater right into the flour, then rub it in with just my fingertips until it looks like coarse crumbs. A pastry blender works too. The food processor is faster, but it's also easier to overwork the dough, so by hand you actually have more control over that flaky, tender texture.
Nine times out of ten, it's too much gluten - and that comes from overworking the dough or adding too much water. Every extra mix and squeeze develops more gluten, which is what makes a crust chewy instead of tender. Keep everything cold, handle the dough as little as possible (stop the moment it comes together), and don't skip the lemon juice - its acid helps keep those gluten strands short. If it's already baked and tough, chalk it up to a lesson and go gentler next time.
You can, with a few tweaks. For whole wheat, I'd swap in no more than half whole-wheat flour so the crust doesn't turn dense and heavy - you'll get a nuttier flavor that's lovely with savory fillings. Gluten-free is trickier, since gluten is what gives the dough its structure: use a 1:1 gluten-free baking blend that contains xanthan gum, expect a more delicate dough, and handle it gently. It won't be quite the same, but it can absolutely work in a pinch.
Here's the recipe in grams for anyone who bakes by weight (it really is more accurate): 360g all-purpose flour, 227g unsalted butter (2 sticks), 12g sugar, 6g salt, 1 egg yolk, and about 120ml ice water, plus 1 teaspoon lemon juice. This makes enough for two 9-inch crusts. As always, keep that butter and water ice-cold.
📖 Recipe
Pate Brisee Pie Crust
Ingredients
- 3 cups All-Purpose Flour
- 1 tablespoon Granulated Sugar
- 1 teaspoon Salt
- 1 cup Unsalted Butter - 2 sticks - super cold
- 1 egg yolk
- ½ cup Water - Super cold ice water is best
- 1 teaspoon Lemon
Instructions
- Get all the dry ingredients measured and in a large mixing bowl. Set that to the side to hang out for a few minutes.
- In a small bowl separate your egg yolk from the white. We are only keeping the yolk, but feel free to keep the while for an omelet or something tomorrow.
- To your egg yolk add the water and lemon, give it a mix and let it hang out next to your flour bowl.
- Critical step! Make sure your butter is super cold, borderline frozen. Grate it, or cut it into super small pieces. I love using my kitchen aid grater attachment for this if you happen to have one.
- Add the butter into your flour mixture, and using only your fingertips rub the flour into the butter pieces.
- Next, create a well in the middle of your flour and add your water/lemon/egg soup.
- Mix this as little as possible until it just starts to come together. Turn it over onto your countertop and kneed JUST until it forms a ball.
- Lay down a layer of plastic wrap, add your dough and smush it down into a thick circular disk. Finish wrapping it up in plastic (I do a few layers) and chill for at least an hour (or overnight).
- When ready to bake, roll the chilled dough on a floured surface with a floured rolling pin. If it cracks, let it sit on the counter a few minutes to soften, then fit it into your pie plate or tart pan.
- Decide whether to blind bake: fillings that bake with the crust (like apple or pumpkin pie) need no blind baking. For pre-cooked, no-bake, or very wet fillings (quiches, custard or cream pies), blind bake the crust first so it doesn't turn soggy.
- To blind bake: preheat the oven to 375°F. Line the crust with parchment paper or foil, covering the edges, then fill with pie weights, dried beans, or uncooked rice. Bake 15-20 minutes to set the crust.
- Remove the parchment and weights, then return the crust to the oven for another 10-15 minutes, until golden and fully cooked. Cool completely before adding any no-bake filling.
- For pies baked with their filling, skip the blind bake and follow your filling recipe's temperature and time (our pumpkin pie bakes about 45-50 minutes). Enjoy!
Shannon says
Do you have this recipe available using weight as measurement? Thanks!
Tabetha Klein says
I believe I can turn on a "swap to weight measurement" feature! Let me see what I can do to get it turned on for you! Thanks for reaching out and asking!